Contrary to popular belief, restoring valuable mid-century furniture isn’t about making it look brand new with aggressive sanding and staining.
- True value preservation comes from a forensic assessment of the piece’s authenticity, material integrity, and historical wear.
- Strategic inaction—choosing what *not* to fix—is often more critical than any physical intervention in protecting its character and worth.
Recommendation: Before you pick up any tool, use this guide to diagnose your piece, identify potential hazards like toxic foam or woodworm, and create a restoration plan that enhances, rather than erases, its legacy.
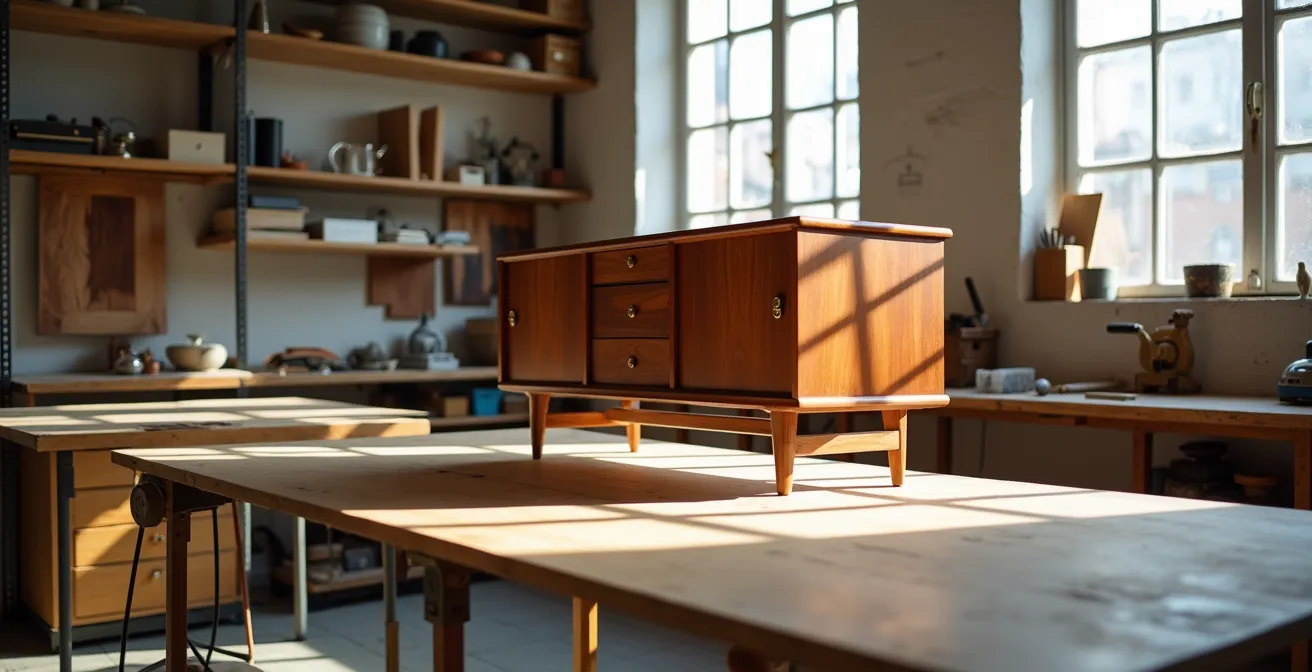
That dusty, forgotten dresser you found at a thrift store could be a diamond in the rough—or a minefield of costly mistakes. For lovers of mid-century modern (MCM) design, the thrill of the hunt is often followed by a daunting question: how to bring this piece back to life without destroying the very thing that makes it special? Many guides will offer simple advice like “clean it gently” or “sand it down.” But this approach often overlooks the crucial distinction between restoration and refinishing. Restoration is a respectful conversation with the past, aiming to stabilize and preserve a piece’s original character. Refinishing, on the other hand, can strip away its history, patina, and ultimately, its value.
The most critical work of restoration happens before you ever touch a piece of sandpaper. It involves a careful, almost forensic, assessment. Is this an authentic designer piece or a later reproduction? Is that wood solid teak or a delicate veneer? Does that cushion hide crumbling, toxic foam? Answering these questions correctly is the difference between a successful project that multiplies the furniture’s worth and a tragic error that turns a valuable antique into just another piece of used furniture. This is where the principle of strategic inaction becomes a restorer’s most powerful tool: knowing when to stop is as important as knowing how to start.
This guide moves beyond generic tips to provide a strategic framework for your restoration projects. We will focus on the crucial decision-making process that professionals use. You will learn how to identify fakes, safely treat common issues like woodworm, assess hidden dangers in old materials, and even blend modern technology like 3D printing with traditional craftsmanship. By mastering this diagnostic approach, you’ll gain the confidence to make choices that honor the piece’s history and maximize its long-term value.
To help you navigate these critical decisions, this article is structured to walk you through the key assessment and action stages. The following sections will provide detailed insights into everything from authentication to final presentation.
Summary: A Strategic Guide to Mid-Century Furniture Restoration
- Why That ‘Eames’ Chair Might Be a Cheap 1990s Knockoff?
- How to Treat Woodworm in Vintage Dressers Before Bringing Them Inside?
- Art Deco vs. Mid-Century: Can They Coexist in One Room?
- The Old Foam Hazard That Releases Toxic Dust
- When to 3D Print Parts: Fixing Vintage Hardware You Can’t Buy
- Optimizing Lifespan: Refinishing Solid Wood vs. Replacing Laminate
- When to Sell: The Seasonal Window for Maximum Profit
- How to Plan a Gallery Wall That Doesn’t Look Cluttered?
Why That ‘Eames’ Chair Might Be a Cheap 1990s Knockoff?
Before any restoration begins, the first and most crucial step is authentication. The financial difference between an original and a copy is immense; market analysis shows that authentic pieces by designers like Eames command 70-90% higher prices than reproductions. Mistaking a valuable original for a simple knockoff can lead you to perform irreversible actions, like aggressive sanding, that destroy its value. A forensic assessment involves looking for clues that tell the story of the piece’s origin and construction. This isn’t just about finding a label; it’s about understanding the subtle language of craftsmanship.
Start your investigation by looking for maker’s marks or stamps, often hidden inside drawers, under tabletops, or on the back of the frame. Beyond labels, examine the construction itself. Authentic MCM pieces often feature signs of handcrafted work, such as dovetail joinery, high-quality wood grain, and slight, charming asymmetries that are absent in mass-produced replicas. The hardware is another key indicator. Original screws, handles, and fasteners have a distinct look and patina of age that is difficult to replicate. Finally, assess the wear patterns. Consistent wear on handles, armrests, and leg bottoms tells a story of genuine use over decades, a narrative that artificial distressing can’t fake. Pay attention to signature design elements, like the distinctive tapered legs often angled outward, which are a hallmark of the period.
Your 5-Step Authentication Audit: From Find to Verdict
- Points of Contact: Systematically list all potential identifiers on the piece. This includes any visible labels, ink stamps, burned-in marks, or engravings on metal hardware.
- Collecte (Evidence Gathering): Inventory the core material elements. Document the type of wood, the fabric of any original upholstery, the specific shape of the legs, and the style of the fasteners (e.g., flathead vs. Phillips screws).
- Cohérence (Consistency Check): Cross-reference your findings with established designer archives. Does the joinery match known techniques of a designer like Hans Wegner? Is the plywood molded in a way characteristic of Eames?
- Mémorabilité/Émotion (Patina & Wear Analysis): Evaluate the wear and tear. Is the patina on the brass handles consistent with 60 years of use, or does it look like a chemical application? Does the piece’s story feel authentic?
- Plan d’Intégration (Strategic Decision): Based on your audit, classify the piece. Is it a confirmed original to be preserved at all costs, a high-quality period reproduction to be enjoyed, or a modern knockoff you can refinish without guilt?
How to Treat Woodworm in Vintage Dressers Before Bringing Them Inside?
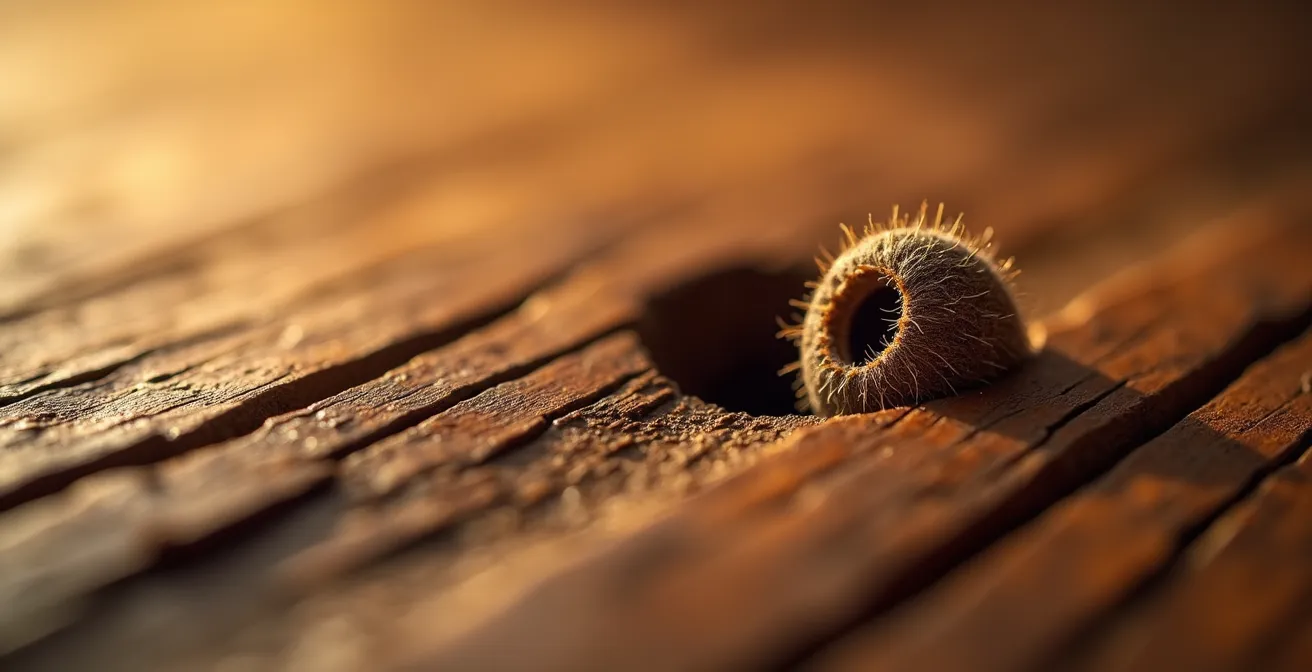
One of the most unwelcome discoveries in a vintage wood piece is the tell-tale sign of woodworm: small, round exit holes, often accompanied by fine dust known as “frass.” Ignoring this issue is not an option, as an active infestation can spread to other wooden items in your home and compromise the structural integrity of your new find. Before you even consider moving the piece indoors, a thorough inspection and treatment are mandatory. The presence of these holes doesn’t automatically mean the infestation is active; look for fresh, light-colored holes and powdery frass as signs of current activity.
This close-up view reveals the characteristic exit holes left by wood-boring insects. Identifying these is the first step in assessing the scope of the problem.
Once you’ve confirmed an infestation, choosing the right treatment method is a strategic decision that balances effectiveness, cost, and impact on the wood. Aggressive chemical treatments can sometimes alter the wood’s color or finish, which is undesirable for a valuable piece. Non-invasive methods like freezing or anoxic (oxygen deprivation) treatments are often preferred in professional conservation as they are highly effective without damaging the material. These methods work by killing the insects and their larvae at all life stages. The choice depends on your budget, the value of the piece, and the resources available to you.
This comparative analysis breaks down the most common professional methods for eradicating woodworm, helping you make an informed decision that protects both your furniture and your home.
| Method | Cost | Impact on Wood | Effectiveness |
|---|---|---|---|
| Professional Fumigation | $500-1500 | Minimal | 99% |
| Freezing (-20°C) | $200-500 | None | 95% |
| Oxygen Deprivation | $100-300 | None | 90% |
Art Deco vs. Mid-Century: Can They Coexist in One Room?
Mid-Century Modern furniture combines post-World War II practicality, ’50s era hope, ’60s era earthiness, and the ’70s era textures and tones.
– Mostly Danish Furniture Ottawa, Why Mid-Century Modern Furniture Is So Valuable
Mixing furniture from different design eras can feel intimidating, but when done thoughtfully, it creates a space with depth, character, and a unique narrative. The sleek, organic lines of Mid-Century Modern and the bold, geometric glamour of Art Deco might seem at odds, but they share a common spirit of modernity and craftsmanship that allows them to coexist beautifully. The key is to create intentional bridges between the styles rather than placing them in direct opposition. This involves identifying shared materials, color palettes, and silhouettes that can act as a common language within the room.
Successful integration relies on a few core design principles. One of the most effective is the 80/20 rule: choose one style to be dominant (80% of the room’s furniture and decor) and use the other as an accent (20%). This creates a clear design anchor while allowing the secondary style to provide exciting contrast. Look for common materials like rich woods (walnut for MCM, mahogany for Deco) and metals like brass, which was popular in both periods. You can also find “transitional” pieces from the 1940s that blend the opulence of late Art Deco with the emerging simplicity of modernism, acting as perfect mediators. The goal is harmony, not a historical reenactment, allowing each piece to shine while contributing to a cohesive whole.
To create a balanced and sophisticated mix, consider these practical strategies:
- Unifying Color and Material: Use brass and dark wood as common threads that appear in both your Art Deco and MCM pieces to tie them together visually.
- Find a Transitional Vibe: Look for pieces with a “Palm Springs” feel, where bright colors and modular patterns can bridge the gap between the two aesthetics.
- Apply the 80/20 Rule: Designate one style as the room’s foundation and use the other for statement pieces, such as an Art Deco mirror above an MCM credenza.
- Use Bridge Pieces: Incorporate furniture from the 1940s, an era that naturally blended elements of both styles, to smooth the transition.
The Old Foam Hazard That Releases Toxic Dust
While the wooden frame of a vintage chair or sofa might be in perfect condition, the upholstery can hide a significant and often overlooked danger: degraded polyurethane foam. Foam manufactured in the mid-20th century, particularly from the 1960s and 70s, is now well past its intended lifespan. As it breaks down, it can turn into a fine, crumbly dust that is easily inhaled. Furniture restoration safety experts warn that this old foam has a 90% chance of containing hazardous isocyanates after 40+ years of degradation, compounds which can cause respiratory issues and other health problems.
The process of removing this old foam must be treated with the same seriousness as handling any hazardous material. It is not a task to be rushed or done without proper protection. The fine dust can become airborne with the slightest disturbance, so creating a safe work environment is the absolute first step. This means working in a well-ventilated area, preferably outdoors or in a garage with open doors, and using personal protective equipment (PPE). The goal is to contain the material and prevent inhalation or skin contact.
This image highlights the essential safety gear and the visual contrast between hazardous old foam and its safe replacement, symbolizing the importance of a clean restoration.

Following a strict safety protocol is non-negotiable when dealing with this material. A methodical approach ensures your safety and proper disposal of the waste. Remember these key steps:
- Work in a well-ventilated room. This is of paramount importance when working with any restoration materials, especially those that create dust or fumes.
- Wear proper PPE. At a minimum, this includes safety goggles, an N95-rated respirator mask to filter fine particulates, and durable nitrile gloves to prevent skin contact.
- Minimize dust. Gently misting the old foam with water before you begin removing it can significantly reduce the amount of dust that becomes airborne.
- Dispose of it correctly. The degraded foam should be sealed in heavy-duty plastic bags and disposed of according to your local regulations for hazardous household waste.
When to 3D Print Parts: Fixing Vintage Hardware You Can’t Buy
One of the most frustrating challenges in furniture restoration is dealing with a broken or missing piece of unique hardware—a custom handle, a specific leg cap, or an ornate bracket that is simply no longer manufactured. In the past, this might have meant giving up or settling for a non-original, ill-fitting replacement that devalued the piece. Today, however, hybrid restoration techniques offer a groundbreaking solution. By blending traditional craftsmanship with modern technology like 3D printing, it’s possible to recreate these impossible-to-find parts with incredible accuracy, preserving the furniture’s original design integrity.
The process isn’t as simple as just printing a new part. To be successful, it requires a thoughtful workflow that respects the original piece. The first step is to capture the part’s exact geometry. If the part is broken but mostly intact, a 3D scan can create a perfect digital model. If the part is missing entirely but a matching one exists elsewhere on the piece, that one can be scanned. Material selection is also crucial; resin printers are excellent for capturing fine details, while other materials can offer greater strength. The true artistry comes in the post-processing. A raw 3D print will look out of place, so meticulous sanding, priming, and finishing are required to match the texture, color, and patina of the original hardware.
This workflow transforms a modern technology into a powerful conservation tool:
- Scan the Original: Before attempting any repair, get a high-resolution 3D scan of a complete version of the part to create a flawless digital blueprint.
- Choose the Right Material: Select a printing material based on the part’s function. Use high-detail resin for decorative elements and stronger filaments like PETG for structural components.
- Post-Process for Authenticity: This is the most critical stage. The printed part must be carefully sanded to eliminate layer lines and primed to create a smooth surface for finishing.
- Match the Finish: Meticulously apply stains, paints, or metallic finishes to blend the repair seamlessly with the vintage piece. This final touch ensures the authentic character is maintained, preserving both its aesthetic and financial value.
Optimizing Lifespan: Refinishing Solid Wood vs. Replacing Laminate
Not all wood furniture is created equal, and understanding the material you’re working with is fundamental to a successful restoration. The most significant distinction is between solid wood, wood veneer, and laminate. Solid wood pieces are made entirely from single pieces of wood, offering incredible durability and the ability to be sanded and refinished multiple times. Veneer consists of a thin layer of high-quality wood glued to a less expensive core, while laminate is a plastic or synthetic printed layer. Attempting to sand a thin veneer or laminate as if it were solid wood will instantly and irreversibly ruin the surface. This diagnostic step is crucial because the material dictates the entire restoration strategy. When done correctly, the return on investment can be substantial; restoration value analysis shows a $200 flea market dresser can gain ten times its value after a professional-quality refinish.
Identifying your material is straightforward. Look at the edges of the piece. On a solid wood item, the wood grain will be continuous from the top surface to the side. On a veneered piece, you’ll see a distinct line where the thin top layer meets the core, and the grain patterns won’t match. Laminate often has a more uniform, repetitive, or slightly artificial-looking grain and a plastic-like feel. Once identified, you can choose the appropriate path. Solid wood offers the most freedom, but even then, the goal should be preservation, not just stripping. Thick, high-quality veneers from the MCM era can often handle a very light hand-sanding, while thin or damaged veneers and all laminates cannot be sanded at all and may require replacement or creative, non-invasive repairs.
The material of your furniture dictates the appropriate restoration method, cost, and resulting durability. This table provides a clear guide for making the right choice.
| Material | Restoration Method | Cost Range | Durability |
|---|---|---|---|
| Solid Wood | Full refinish | $300-800 | 40+ years |
| Thick Veneer | Light sanding & refinish | $200-500 | 20+ years |
| Thin Laminate | Replacement only | $150-400 | 10-15 years |
Key Takeaways
- The most valuable restoration skill is assessment, not sanding. Identifying a piece’s authenticity and materials is the first and most critical step.
- Strategic inaction is key. Preserving original patina and character is often more valuable than creating a flawless, “new” finish.
- Always prioritize safety. Old materials like foam can be toxic, and infestations like woodworm must be fully eradicated before a piece enters your home.
When to Sell: The Seasonal Window for Maximum Profit
If your goal is to restore and sell, timing the sale can be just as important as the quality of your restoration. The market for vintage furniture is not static; it fluctuates based on seasons, cultural trends, and local events. Understanding these cycles can significantly impact your final profit margin. For instance, market research indicates that the Southern California MCM scene has 40% higher demand during estate sale seasons (typically spring and fall), when more buyers are actively hunting for pieces. Tapping into these windows of peak demand ensures your piece gets maximum visibility among motivated buyers.
Beyond seasonality, conducting your own market research is essential for setting a realistic and profitable price. Online marketplaces are invaluable tools for this. A professional tactic is to search for items similar to yours and then filter the results to show only “sold” or “completed” listings. This technique moves beyond aspirational asking prices and shows you what buyers are actually willing to pay for a given piece in its current condition. This data-driven approach removes guesswork and positions your item competitively. Proper documentation of your restoration process, with compelling before-and-after photos, can further justify your price by showcasing the value you’ve added.
To maximize your return, your sales strategy should be a calculated process, not an afterthought. Follow these steps to prepare your piece for the market:
- Confirm Authenticity: Before listing, double-check for any maker’s marks or designer signatures. This is your primary value proposition.
- Research Local Comps: Check local online classifieds like Craigslist or Facebook Marketplace. This is the best way to gauge what other sellers are asking for comparable pieces in your specific region.
- Document Everything: Create a compelling narrative with high-quality before-and-after photos of your restoration. This visual proof of transformation is a powerful sales tool.
- Time Your Listing: Align your sale with moments of peak interest, such as local design fairs, home-buying seasons, or broader cultural moments that bring attention to vintage design.
How to Plan a Gallery Wall That Doesn’t Look Cluttered?
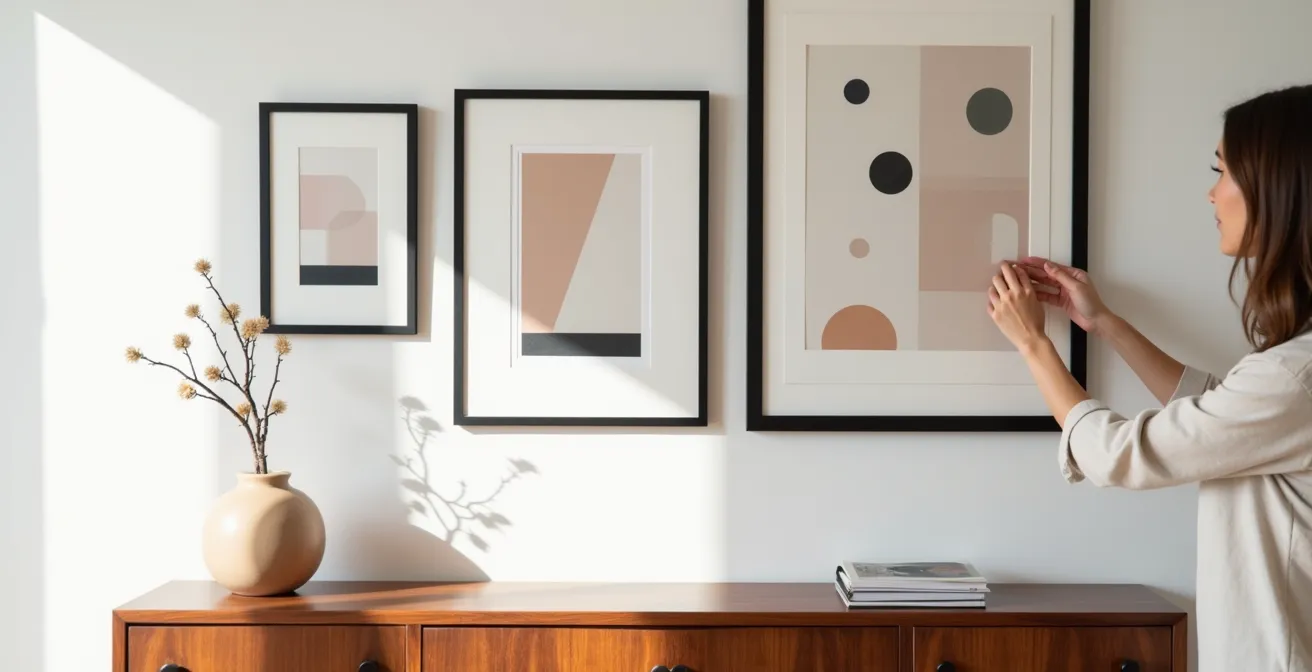
A gallery wall is a perfect way to display art and personal items, but without a clear plan, it can quickly devolve from a chic collection into a cluttered mess. With Mid-Century Modern decor, the goal is to achieve a look that feels curated, balanced, and intentional, reflecting the era’s emphasis on clean lines and organic forms. The secret to a successful MCM gallery wall is not perfect symmetry but rather asymmetric balance. This involves arranging items of different sizes and shapes in a way that feels visually weighted and harmonious without being rigid or predictable. Negative space—the empty wall space between frames—is just as important as the art itself, giving the collection room to breathe.
This composition demonstrates the principles of an asymmetrically balanced gallery wall, where negative space and careful placement create a feeling of effortless style.
To achieve this look, start by laying out your collection on the floor before hanging anything. This allows you to experiment with arrangements and find a composition that works. Begin with your largest or most important piece, placing it slightly off-center to act as the anchor. Then, build out from there, adding smaller pieces around it. Maintain a consistent spacing of about 2-3 inches between each frame to create a cohesive feel. A limited color palette (3-4 dominant colors) and a mix of frame materials (like thin black metal and natural wood) will add interest without overwhelming the eye. The final arrangement should feel dynamic yet unified, a thoughtful collection rather than a random assortment.
Follow these design principles for a perfectly curated MCM gallery wall:
- Establish an Anchor: Start with your largest piece and place it off-center to create a dynamic focal point.
- Maintain Consistent Spacing: Keep a uniform distance of 2-3 inches between all frames to ensure the arrangement looks intentional and cohesive.
- Limit Your Color Palette: Stick to a maximum of 3-4 primary colors throughout the artwork to avoid visual chaos.
- Mix Frame Materials: Combine different materials like wood and metal, but keep the frame profiles thin and simple to align with the MCM aesthetic.
- Embrace Negative Space: Ensure that at least 40% of the total gallery wall area is empty space, allowing each piece to stand out.
By embracing a philosophy of careful assessment and strategic intervention, you transform from a simple tinkerer into a true custodian of design history. This approach not only protects the financial value of your finds but also honors the craftsmanship and story embedded in each piece. Evaluate your restoration projects through this lens to ensure your efforts celebrate, rather than erase, the past.